How to Set Up Smart Lighting at Home: Complete Beginner’s Guide (2026)
By Sanso Uka
Setting up smart lighting at home is one of the most accessible entry points into home automation — no electrician required for the most common setups, and you can start with a single bulb for under $15. The core decisions most beginners get wrong are choosing between smart bulbs and smart switches without understanding the trade-offs, and picking a platform that locks them into one brand. This guide walks through everything from the first device to full-room automations, in the right order.
Step 1 — Choose Your Ecosystem First
Before buying a single bulb or switch, decide which platform you’ll control everything from. Your three main options are Amazon Alexa, Google Home, and Apple Home (HomeKit). All three are free to use, work with hundreds of devices, and support voice control, schedules, and automations. The right choice depends mostly on what devices you already own:
- Amazon Alexa — broadest device compatibility, strong voice control, works well on Android and iOS. Best if you already have an Echo speaker or prefer the widest selection of compatible hardware.
- Google Home — tightest integration with Android phones and Google Nest devices. Automation routines have improved significantly with the 2025 app redesign.
- Apple Home (HomeKit) — best privacy model (most processing stays on-device), cleanest iOS and Mac integration, but historically had the narrowest device selection. Matter has partially closed that gap.
The good news in 2026 is that most new lighting products are Matter-certified, which means they work across all three ecosystems simultaneously. You’re not locked in the way you were two years ago. Still, pick one app as your primary control interface — trying to manage lighting from three different apps at once creates more confusion than it solves. Check out our guide to voice assistants and ecosystems if you’re still deciding.
📌 Don’t forget to save this post — it covers every stage from first bulb to full automation.
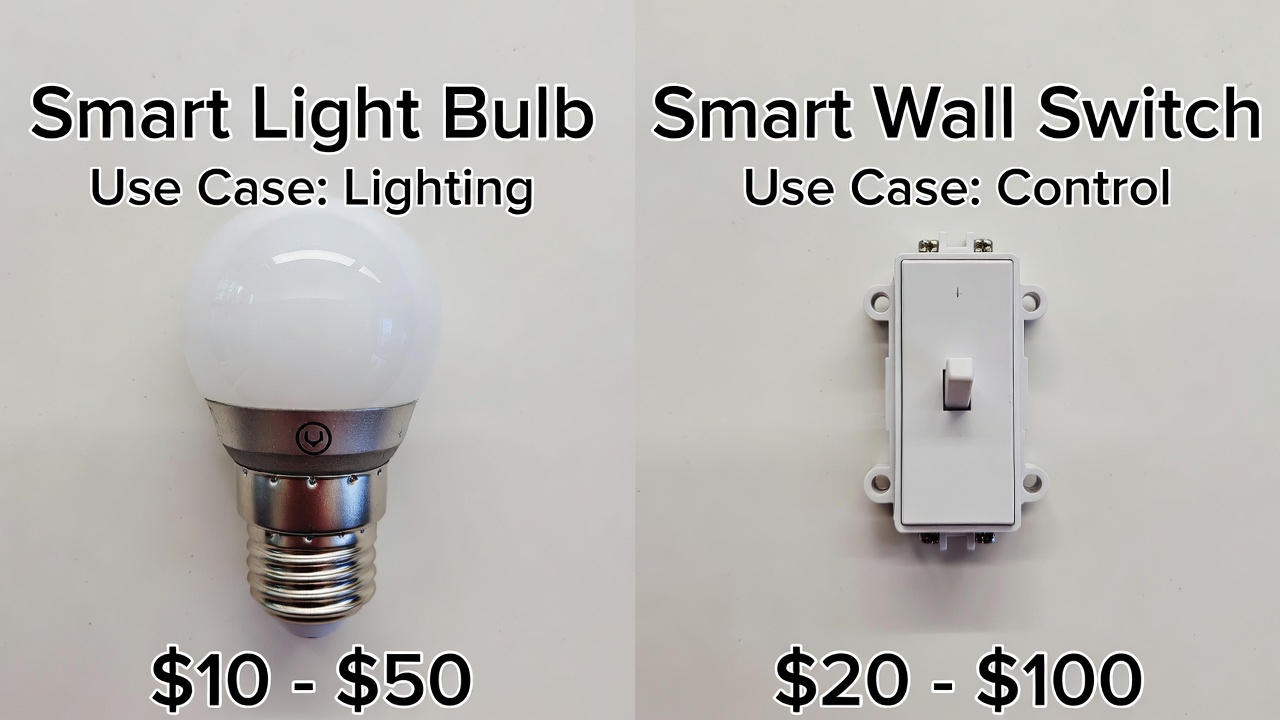
Step 2 — Smart Bulbs vs. Smart Switches: Pick the Right One for Each Room
This is the decision most guides rush past, and it’s where a lot of people spend money on the wrong thing. Smart bulbs and smart switches each have clear use cases — and in some rooms, they’re not interchangeable.
When Smart Bulbs Make Sense
Smart bulbs screw into existing sockets with zero wiring. They’re ideal for lamps, table lights, and any fixture where you want color-changing capability or fine-grained per-bulb control. They work in rentals without touching the wiring. Budget options like the TP-Link Tapo L530E or Kasa KL135 run $10–$20 per bulb and connect directly to Wi-Fi without a hub. For color and ambiance rooms — bedrooms, living rooms, entertainment spaces — smart bulbs deliver features that no switch can replicate.
The limitation is real: if anyone in the house turns a lamp or wall switch off at the physical switch, the bulb loses power and goes offline. Voice commands and schedules stop working. This is not a brand-specific issue — it affects every smart bulb on the market. In rooms where people habitually use physical switches, smart bulbs are a frustrating choice.
When Smart Switches Make More Sense
Smart switches replace the wall switch itself and work with any standard bulb in the fixture. Once installed, the physical switch still functions normally, guests can flip it without issues, and the smart features are always available. For rooms with recessed ceiling lights, multiple bulbs on one circuit, or anywhere people routinely use the physical switch, a smart switch controlling regular LED bulbs is almost always more reliable than filling every socket with a smart bulb.
Cost math matters here too. A TP-Link Kasa KS225 Matter smart switch runs around $22–$28 and controls every bulb on that circuit. Putting three smart bulbs at $15 each in the same fixture costs $45 and still breaks whenever someone hits the wall switch. Smart switches win on cost-per-room for most ceiling light setups.
The catch: smart switches require a neutral wire in the wall box. Most homes built after the mid-1990s have one — a white wire separate from the hot and ground. Older homes may not. If you open your switch box and there’s no neutral wire, look at Lutron Caséta switches, which use a proprietary wireless protocol (ClearConnect) that doesn’t require a neutral wire and is widely considered one of the most reliable smart switch systems available. Lutron Caséta starter kits with a hub start around $80–$100.
Philips Hue: A Specific Note
Philips Hue makes excellent bulbs — color-accurate, long-lasting (rated 25,000 hours), and deeply integrated with every major platform. But they require a Hue Bridge hub (~$40–$60) for full functionality, and individual color bulbs run $25–$50 each. The total investment for a living room with four recessed lights can easily hit $150–$250. That’s justified if you genuinely want color scenes and advanced automations. For rooms where you just want app control and scheduling, $22 worth of Kasa bulbs or a single Kasa switch does the same job at a fraction of the cost.
Also worth knowing: Hue bulbs and standard smart switches don’t mix well. Cutting power to a Hue bulb via a wall switch causes it to lose its last scene state and often requires reconnecting through the app. If you own Hue bulbs and want tactile wall control, use the Philips Hue Dimmer Switch (~$25), which is battery-powered and communicates wirelessly with the Hue Bridge — no wiring, no power cuts, no state loss.
Step 3 — Do You Need a Hub?
This question trips up more beginners than any other. The short answer: for most people starting out in 2026, no hub is required.
Wi-Fi smart bulbs and switches from brands like TP-Link Kasa, Tapo, Wyze, Govee, and Meross connect directly to your home router and are controlled through their app or any compatible voice assistant. No extra hardware needed. Matter-certified versions of these devices also work across Alexa, Google Home, and Apple Home without a hub.
You’ll need a hub in these specific situations:
- You’re buying Philips Hue — the Hue Bridge is required for full features and enables Zigbee-based local control.
- You’re buying Lutron Caséta switches — the Caséta Smart Bridge (~$80) is mandatory and enables the no-neutral-wire functionality and ClearConnect reliability.
- You’re building a larger system with Zigbee or Z-Wave devices — these use lower-power mesh protocols that need a hub (like Samsung SmartThings, Aqara Hub, or a dedicated Zigbee coordinator) to connect to the internet.
If you own an Apple HomePod mini ($99), an Apple TV 4K, or an iPad left at home, those already act as a Thread Border Router and HomeKit hub — so Apple users often have hub capability built into devices they already own.
Step 4 — Install Your First Devices
Installing a Smart Bulb (5 Minutes)
- Screw the smart bulb into the lamp or fixture as you would any bulb. Make sure the wall switch feeding the fixture is in the ON position — it needs to stay on.
- Download the brand’s app (Kasa, Tapo, Wyze, Hue, etc.) and create an account.
- In the app, tap “Add Device” and follow the pairing steps. Most bulbs enter pairing mode by cycling the power (on-off-on-off) three times. The app handles the rest.
- Connect to your 2.4 GHz Wi-Fi network — not the 5 GHz band. Nearly all smart lighting devices use 2.4 GHz only. If your router broadcasts both bands under the same name, you may need to temporarily separate them in your router settings.
- Name the bulb something clear: “Bedroom Lamp” or “Living Room Left” — this name is what voice assistants use when you say “turn off the bedroom lamp.”
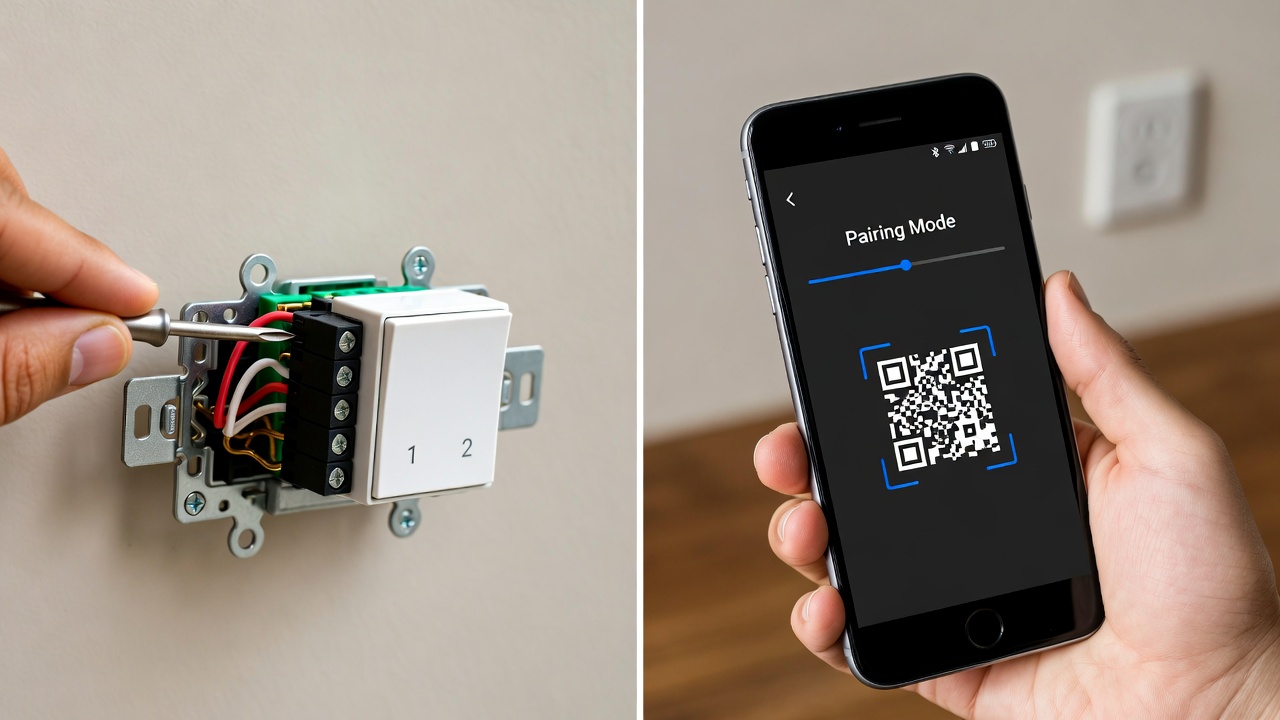
Installing a Smart Switch (20–40 Minutes, Requires Turning Off the Breaker)
- Turn off the circuit breaker for the room you’re working in. Use a voltage tester to confirm the power is off before touching any wires — this is not optional.
- Remove the existing switch plate and unscrew the switch from the wall box. Take a photo of the existing wiring before disconnecting anything.
- Identify the wires: Line (hot, black) brings power in, Load (black) sends power to the fixture, Neutral (white) completes the circuit, Ground (green or bare copper). Some boxes also have traveler wires for 3-way setups — consult the specific switch’s manual for those.
- Connect wires to the smart switch’s matching terminals, attach the switch to the box, restore the breaker, and follow the app pairing steps as with a bulb.
If wiring feels outside your comfort zone, hiring an electrician for the first installation — typically $75–$150 for a single switch — is a reasonable option. Once you’ve seen it done once, subsequent installations are straightforward. For a detailed reference, the Technology.org smart switch installation guide is a thorough step-by-step walkthrough. See also our broader home automation setup guide for parallel device installations.
Step 5 — Set Up Automations That Actually Help
This is where smart lighting stops being a novelty and starts being useful. Once your devices are connected to Alexa, Google Home, or Apple Home, you can build automations in those apps that run without any manual input.
Automations Worth Setting Up First
- Sunrise/sunset schedules — turn outdoor and porch lights on at sunset, off at sunrise. All three major ecosystems support this natively and update the schedule daily based on your location. No more lights left on all night.
- Away mode — when everyone leaves home, turn all lights off. Most ecosystems detect this through phone location. Alexa and Google Home call it “Away” mode; Apple Home uses location-based automations tied to a HomePod or Apple TV hub at home.
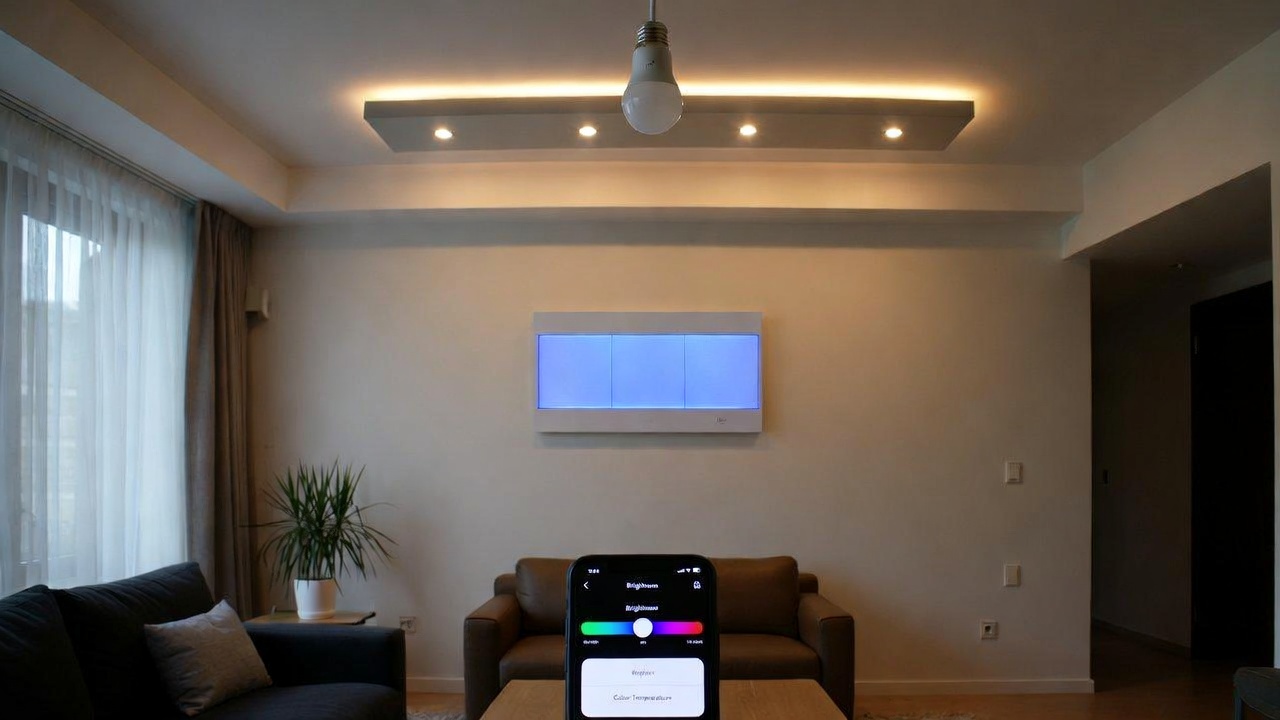
- Morning routine — lights in the bedroom or kitchen come on at a specific brightness and color temperature at your wake time. Warmer color (2700K) is easier on the eyes than cool white (5000K) first thing in the morning.
- Motion sensor triggers — if you add a smart motion sensor ($15–$35) to a hallway or bathroom, the lights there can turn on when someone walks in and off after a set idle period. Saves energy and removes the need to flip a switch in the middle of the night.
Room-by-Room Suggestions
In the living room, smart bulbs with color temperature control (tunable white, 2700K–6500K) let you run cooler light for daytime and warmer, dimmer light for evenings. Philips Hue or LIFX are the premium choice here; Wyze and Kasa color bulbs at $12–$18 each cover the basics on a budget. In the kitchen, smart switches make more sense than bulbs — kitchens have multiple recessed lights on one circuit, people use physical switches constantly, and color-changing capability is rarely useful over task lighting. A Kasa or Tapo smart dimmer switch handles this for $25–$35. In bedrooms, the combination that works best is smart bulbs in bedside lamps (for color and fine-grained app control) plus a smart switch for the ceiling fan or main overhead fixture.
💡 Save this guide for later — the room-by-room breakdown is the section most people return to when expanding their setup.
Common Mistakes to Avoid
Mixing smart bulbs and wall switches on the same circuit. If you install a smart switch and also put a smart bulb in the fixture it controls, cutting power via the switch disables the bulb — defeating the purpose. Choose one or the other per circuit.
Buying non-Matter devices without checking compatibility. Older or budget devices from lesser-known brands may use proprietary apps with no Matter or Alexa/Google support. Check the box for “Works with Alexa,” “Works with Google Home,” or the Matter logo before buying.
Naming devices poorly. Calling something “Light 1” makes voice control useless. Use location-specific names from the start: “Kitchen Counter,” “Office Desk Lamp,” “Front Porch.” Group devices into rooms in the app — this lets you say “turn off the bedroom” to control every device in that room at once.
Ignoring your router setup. More than a dozen smart devices all hammering your 2.4 GHz band can cause connection drops. If you’re building out a large system, consider a Wi-Fi 6 router or a mesh Wi-Fi system, and consider Zigbee or Z-Wave devices for high-density rooms since those protocols don’t compete with your main Wi-Fi network. See our smart lighting and security device guide for network-friendly device picks.
Realistic Costs to Plan For
A single-room starter setup — two smart bulbs and one smart switch — runs $40–$75 depending on brands. Expanding to a three-bedroom home with smart switches in most rooms, smart bulbs in lamps, and a few motion sensors runs roughly $200–$400 as a DIY project. Philips Hue ecosystem in the same home — with color bulbs throughout and the required Hue Bridge — can reach $500–$800+. None of these setups require professional installation if you’re comfortable with basic wiring and app configuration.
Ongoing costs are minimal: most smart lighting apps are free, and subscriptions aren’t typically required for lighting specifically (unlike smart cameras). Energy savings from scheduling and dimming are modest — expect to trim 10–20% off the lighting portion of your electricity bill over time, not a dramatic transformation.
The Bottom Line
Smart lighting setup in 2026 is genuinely beginner-friendly, largely because Matter-certified devices have simplified compatibility and because Wi-Fi bulbs and switches no longer need a hub to get started. The most important choices happen before you buy anything: pick one ecosystem as your primary app, decide per room whether bulbs or switches make more sense based on how the space is actually used, and prioritize Matter-certified devices to keep your options open as you expand.
The practical starting point for most people: one smart switch in the kitchen or living room (~$25), two color-tunable smart bulbs for bedside lamps (~$30), and an Alexa or Google Home speaker you may already own. Get comfortable with schedules and voice control on that setup before adding more. The automation side of smart lighting — the part that makes it actually save time and energy — only gets interesting once the basics are solid and working reliably.
❤️ Bookmark this post to try these ideas later — especially if you’re planning to expand room by room over the next few months.
- How to Set Up Smart Lighting at Home
 How to Set Up Smart Lighting at Home: Complete Beginner’s Guide (2026) How to Set Up Smart… Read more: How to Set Up Smart Lighting at Home
 - IoT Devices for Beginners
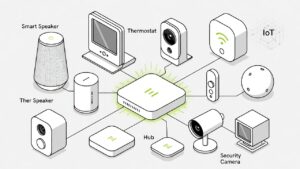 Best IoT Devices for Beginners in 2026: Where to Start Best IoT Devices for Beginners in 2026:… Read more: IoT Devices for Beginners
 - Best Smart Smoke Detector 2026
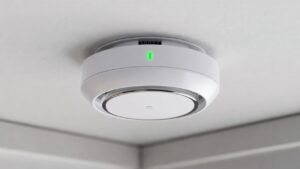 Best Smart Smoke Detector 2026: Which One Actually Protects Your Home? By Sanso Uka Let’s be honest—most… Read more: Best Smart Smoke Detector 2026
 - How to Control Your Smart Home with Your Phone
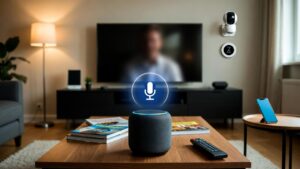
 How to Control Your Smart Home with Your Phone: A Practical Setup Guide By Sanso Uka Learning… Read more: How to Control Your Smart Home with Your Phone
 - Best Smart Lock 2026
 Best Smart Lock 2026: Which One Actually Keeps Your Home Secure? By Sanso Uka A smart lock… Read more: Best Smart Lock 2026
 - Smart Home Privacy Risks
 Smart Home Privacy Risks: What Your Devices Are Actually Collecting and How to Stop It By Sanso… Read more: Smart Home Privacy Risks
 - Best Robot Vacuum 2026
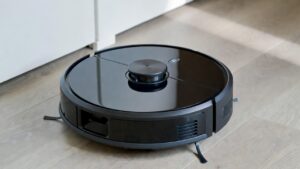 Best Robot Vacuum 2026: Which One Should You Actually Buy? By Sanso Uka Robot vacuums have officially… Read more: Best Robot Vacuum 2026
 - Google Home vs Amazon Echo 2026
 Google Home vs Amazon Echo 2026: Which Should You Buy? Google Home vs Amazon Echo 2026: Which… Read more: Google Home vs Amazon Echo 2026
 - Smart Home Worth It in 2026
 Is a Smart Home Worth It in 2026? Honest Pros, Cons & Real Costs Is a Smart… Read more: Smart Home Worth It in 2026
 - Smart Home Automation
 How Smart Home Automation Works in 2026: A Complete Guide How Smart Home Automation Works in 2026:… Read more: Smart Home Automation
 - Best Smart Doorbell 2026
 Best Smart Doorbell 2026: Which One Actually Secures Your Front Door? By Sanso Uka Your front door… Read more: Best Smart Doorbell 2026
 - How Smart Home Automation
 How Smart Home Automation Works in 2026: A Complete Guide How Smart Home Automation Works in 2026:… Read more: How Smart Home Automation