How to Control Your Smart Home with Your Phone: A Practical Setup Guide
By Sanso Uka
Learning how to control your smart home with your phone is easier than most tutorials make it sound — but there are a few decisions upfront that will either make your setup smooth or frustrating for years. This guide walks through everything: picking the right app ecosystem, connecting devices, setting up automations, and fixing the most common problems people run into. No assumed tech knowledge, no skipped steps.
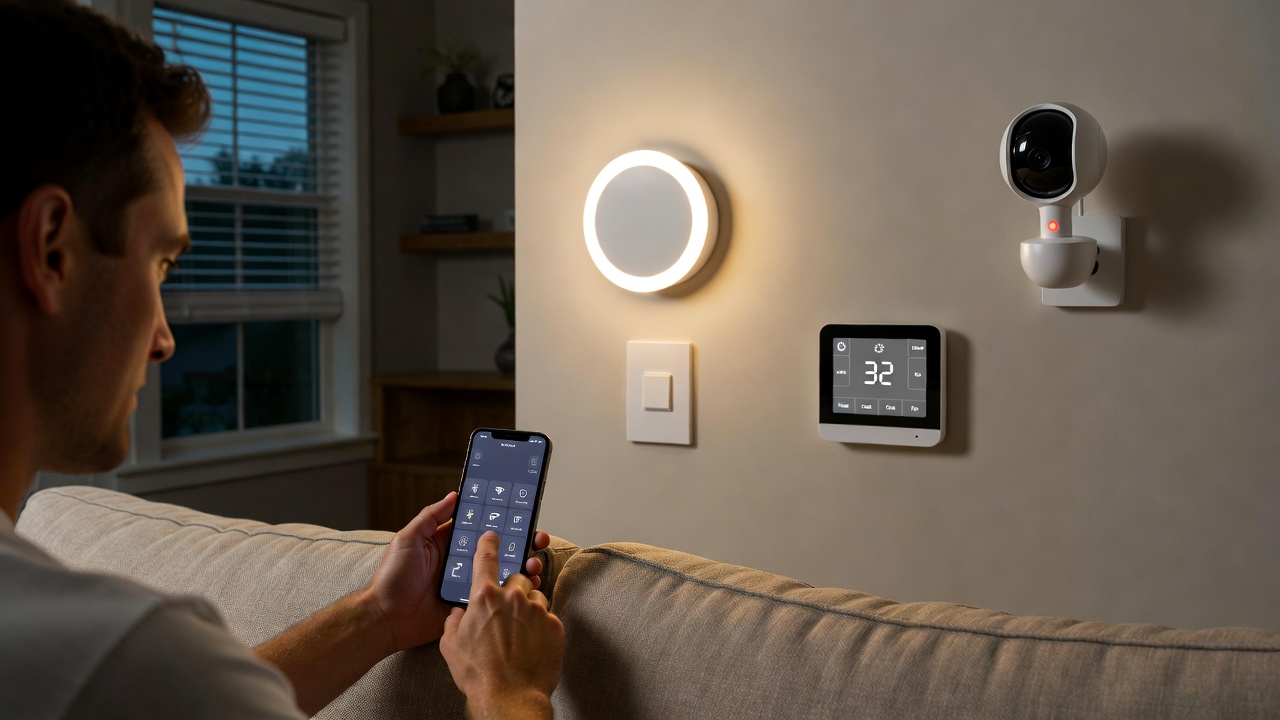
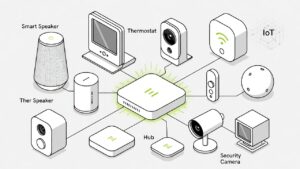
The short version: your phone becomes the remote control for everything in your home — lights, locks, thermostat, cameras, plugs, speakers — through one or more apps. The key is making sure your devices speak the same language as your phone before you buy anything.
💡 Save this guide for later — it’s a reference you’ll return to every time you add a new device.
Step 1: Choose Your Smart Home Ecosystem
Every smart home app runs inside a platform, and the four main ones are Google Home, Amazon Alexa, Apple HomeKit, and Samsung SmartThings. Choosing one as your primary hub matters because not all devices work with all platforms, and splitting your home across two or three apps creates more headaches than it solves.
- Google Home — Best if you use Android phones and Google services. Wide device compatibility, solid automations, and integrates naturally with Google Assistant and Chromecast.
- Amazon Alexa — The widest third-party device support of any platform. Works on Android and iOS. Best choice if you already own Echo speakers.
- Apple HomeKit — The most private and secure option. Requires an iPhone or iPad. Works seamlessly with Siri but has a narrower device catalog. If you have a HomePod mini or Apple TV 4K, those act as your home hub automatically.
- Samsung SmartThings — Best for people with Samsung appliances, Galaxy phones, or mixed-protocol setups (Zigbee, Z-Wave, Wi-Fi, and Matter all in one app).
The good news: since 2023, the Matter standard means a growing list of devices work across all four platforms simultaneously. If a device is Matter-certified, it doesn’t lock you into one app. Look for the Matter badge when shopping.
Step 2: Download the Right Apps
Start with your ecosystem app — Google Home, Amazon Alexa, Apple Home, or SmartThings. That’s your primary control center. Then, individually, most device brands (Philips Hue, Kasa, Govee, Ring, Nest, Arlo, Ecobee, etc.) have their own companion apps for deeper control.
Here’s how the two layers work in practice:
- Brand app — Used for initial setup, firmware updates, and advanced settings specific to that device.
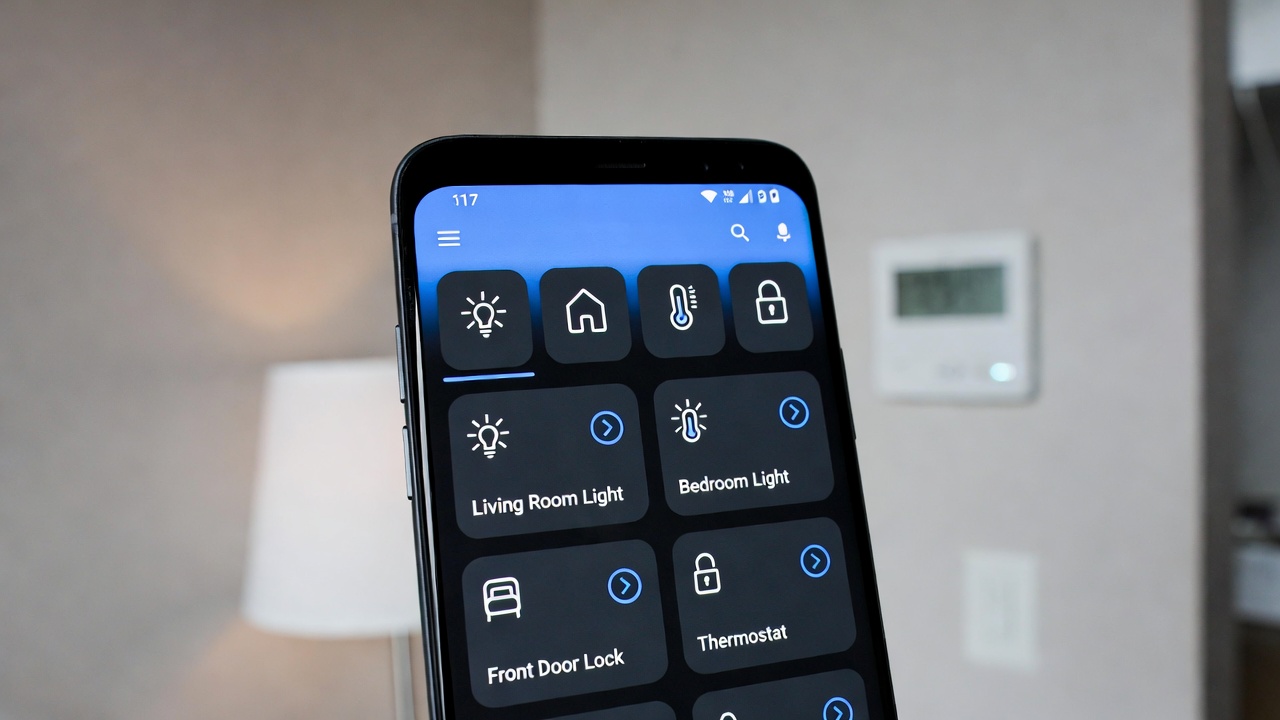
- Ecosystem app — Used for day-to-day control, room groupings, scenes, automations, and controlling everything from one place.
You don’t need to open the brand app every day. Once a device is configured and linked, you’ll mostly live inside Google Home, Alexa, or Apple Home for everything.
For Android users, exploring Android tips for smart home automation can save you a significant amount of setup time with built-in routines and widgets.
Step 3: Connect Your Devices to Your Phone
The connection process varies slightly by device type, but the general flow is the same:
- Plug in or install the device — Smart bulbs go in the socket, smart plugs go in the outlet, smart locks replace or attach to your existing deadbolt.
- Open the brand app — Most devices use Bluetooth for initial discovery. Keep your phone close (within 10 feet) during setup.
- Connect to Wi-Fi — The app will prompt you to enter your 2.4GHz Wi-Fi password. Note: most smart home devices do not support 5GHz Wi-Fi. Make sure your phone is on 2.4GHz during setup.
- Link to your ecosystem — Inside Google Home, Alexa, or Apple Home, go to “Add device” or “Set up device” and select the brand. Log in with your brand account, and the device appears in your ecosystem app.
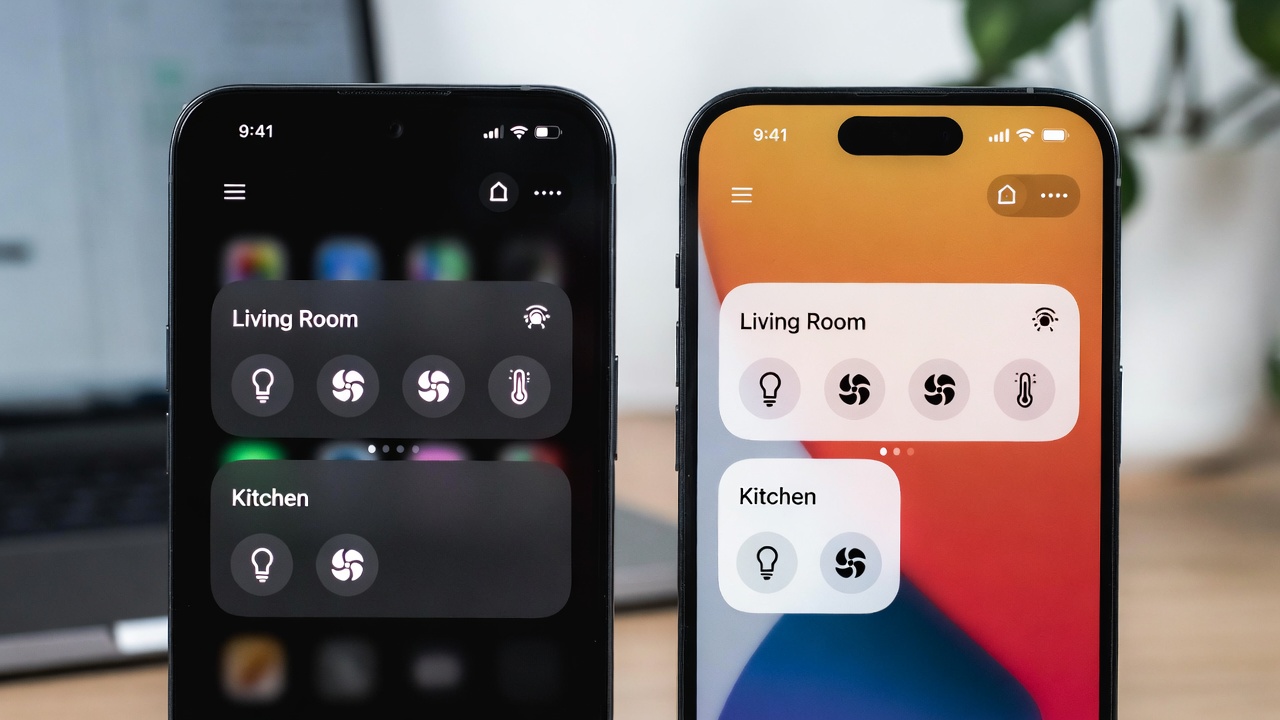
- Assign it to a room — Group devices by room (Living Room, Bedroom, Kitchen). This lets you say “turn off the bedroom lights” or tap a room tile to control everything at once.
If a device fails to connect, 90% of the time it’s one of three things: the phone is on 5GHz Wi-Fi instead of 2.4GHz, the Wi-Fi password was entered incorrectly, or the device needs a firmware update before it can pair. Restart the device, re-check your network band, and try again.
Step 4: Set Up Automations and Routines
This is where a smart home actually becomes smart. Without automations, you’re just using an app as a remote control — which is convenient but not transformative. Automations trigger actions based on time, location, sensor input, or other device states.
Some practical automations that work well across all platforms:
- Sunrise/sunset lighting — Lights turn on at sunset and off at a set bedtime. No schedule adjustment needed as seasons change.
- Geofencing — When your phone leaves home, the thermostat switches to away mode and lights turn off. When you return, the house warms back up 15 minutes before you arrive.
- Motion-triggered lights — A motion sensor in the hallway or bathroom turns the light on when someone enters and off 2 minutes after the last detected movement.
- Good morning routine — At 7:00 AM, the bedroom lights gradually brighten (0% to 70% over 10 minutes), the thermostat rises to 70°F, and a morning news briefing plays on a smart speaker.
- Away mode — When no one is home for more than 30 minutes (geofence + no motion), all lights off, thermostat set back, and security cameras switch to active recording mode.
Google Home, Alexa, and Apple Home all call these differently — “Automations,” “Routines,” and “Automations” respectively — but the logic is the same: trigger → action. Start with one simple automation to learn the interface before building anything complex.
Step 5: Control Your Home Remotely
Remote access means controlling your home from anywhere with a cell or Wi-Fi connection — not just from your couch. Most smart home devices support this natively, but there are requirements:
- For Google Home: Remote access works automatically as long as your phone is signed into your Google account and the devices are online.
- For Alexa: Same — remote access is on by default through the Alexa app. No extra setup.
- For Apple HomeKit: You need a home hub — either an Apple TV 4K, HomePod, or HomePod mini permanently connected at home. Without one, remote access doesn’t work.
- For SmartThings: Remote access is built in via Samsung account login.
One important caveat: if your home internet goes down, remote access stops working for all cloud-based devices. Locally-controlled devices (like Zigbee or Z-Wave on a SmartThings hub) will still respond to commands made from inside the home network, but you won’t be able to reach them from outside. This is a meaningful reason some people invest in a local-processing hub for critical devices like door locks and alarms.
For a full look at how voice assistants fit into remote control workflows, see our breakdown of voice assistants for smart home control.
Useful Shortcuts: Widgets, Lock Screen Controls, and Quick Tiles
Opening an app every time you want to flip a light is one step too many. Both Android and iOS offer faster options:
- Android home screen widgets — Google Home, SmartThings, and Kasa all offer widgets you can pin to your home screen. A single tap turns a light on or runs a routine without opening the full app.
- iOS Home app widgets — Apple Home has lock screen and home screen widgets on iOS 16 and later. You can put a scene button (like “Good Night”) directly on the lock screen.
- Android Quick Settings tiles — Some smart home apps (including Google Home) let you add tiles to the notification pull-down. Swipe down twice and tap to run a scene.
- Siri and Google Assistant shortcuts — Set custom phrases. “Hey Google, movie time” can dim the lights, turn on the TV input, and lower the blinds in one command.
For iOS users, the Shortcuts app adds another layer of power — you can chain HomeKit automations with other iPhone actions (like setting Do Not Disturb when a “Sleep” scene activates). Check our guide on iOS features for power users for a deeper walkthrough.
Common Problems and How to Fix Them
A few issues come up repeatedly regardless of which ecosystem or devices you use:
- Device shows as “unavailable” in app: Usually a Wi-Fi dropout or a firmware update that reset the device. Unplug it for 10 seconds, plug back in, and wait 60 seconds for it to reconnect.
- App can’t find device during setup: Confirm your phone is on 2.4GHz Wi-Fi. Some phones auto-switch to 5GHz during setup and the device never pairs. After setup, your phone can go back to 5GHz.
- Automations trigger at wrong times: Check that your location and time zone are correct in the ecosystem app. Sunrise/sunset automations depend on your home’s location being set accurately.
- Voice commands don’t work for newly added devices: In Alexa, say “Alexa, discover devices” or go to the Alexa app and run device discovery. In Google Home, say “Hey Google, sync my devices.”
- Geofencing is unreliable: This is almost always a background app permission issue. Make sure the ecosystem app has “Always On” location access (not “While using”), and that battery optimization is disabled for that app on Android.
How Many Devices Can You Control from One Phone?
There’s no practical upper limit set by the apps themselves — Google Home, Alexa, and SmartThings all support hundreds of devices per account. The real limit is your home network. Most consumer routers start showing instability above 50–60 connected devices on 2.4GHz. If you’re planning a large smart home, consider a router with dedicated IoT network support or a mesh system with a separate IoT SSID.
TP-Link Deco and Eero both support a separate IoT network out of the box, which isolates smart home traffic from your computers and phones — better security and better performance. For anyone putting 20+ smart devices on their network, it’s worth looking into.
The official Google Home Matter device list is a useful reference for checking compatibility before purchasing new devices.
❤️ Bookmark this post to try these ideas later — especially before you add your next device and hit a connectivity snag.
Conclusion: Where to Start
The most common mistake people make is buying devices before choosing an ecosystem. Pick your primary platform first — Google Home if you’re on Android, Apple Home if you’re on iPhone, Alexa if you want the widest device selection — and then buy devices that are explicitly compatible with it. Matter-certified devices are the safest long-term bet.
For a first-timer, the simplest starting point is two or three smart bulbs, a smart plug, and your ecosystem app. Get those working reliably, learn the automation interface, and then expand. Trying to do the whole house at once is the fastest path to a frustrating afternoon and a drawer full of devices that almost work.
Once you’re set up, the automation possibilities go far beyond what most people realize — and the whole thing runs from the phone already in your pocket. Start small, build from there, and your home will actually earn the word “smart.”
📌 Don’t forget to save this post — it’s the troubleshooting reference you’ll want the first time a device goes unavailable at 11 PM.
- How to Set Up Smart Lighting at Home
 How to Set Up Smart Lighting at Home: Complete Beginner’s Guide (2026) How to Set Up Smart Lighting at… Read more: How to Set Up Smart Lighting at Home
 - IoT Devices for Beginners
 Best IoT Devices for Beginners in 2026: Where to Start Best IoT Devices for Beginners in 2026: Where to… Read more: IoT Devices for Beginners
 - Best Smart Smoke Detector 2026
 Best Smart Smoke Detector 2026: Which One Actually Protects Your Home? By Sanso Uka Let’s be honest—most of us… Read more: Best Smart Smoke Detector 2026
 - How to Control Your Smart Home with Your Phone
 How to Control Your Smart Home with Your Phone: A Practical Setup Guide By Sanso Uka Learning how to… Read more: How to Control Your Smart Home with Your Phone
 - Best Smart Lock 2026
 Best Smart Lock 2026: Which One Actually Keeps Your Home Secure? By Sanso Uka A smart lock is one… Read more: Best Smart Lock 2026
 - Smart Home Privacy Risks
 Smart Home Privacy Risks: What Your Devices Are Actually Collecting and How to Stop It By Sanso Uka Smart… Read more: Smart Home Privacy Risks
 - Best Robot Vacuum 2026
 Best Robot Vacuum 2026: Which One Should You Actually Buy? By Sanso Uka Robot vacuums have officially reached the… Read more: Best Robot Vacuum 2026
 - Google Home vs Amazon Echo 2026
 Google Home vs Amazon Echo 2026: Which Should You Buy? Google Home vs Amazon Echo 2026: Which Should You… Read more: Google Home vs Amazon Echo 2026
 - Smart Home Worth It in 2026
 Is a Smart Home Worth It in 2026? Honest Pros, Cons & Real Costs Is a Smart Home Worth… Read more: Smart Home Worth It in 2026
 - Smart Home Automation
 How Smart Home Automation Works in 2026: A Complete Guide How Smart Home Automation Works in 2026: A Complete… Read more: Smart Home Automation
 - Best Smart Doorbell 2026
 Best Smart Doorbell 2026: Which One Actually Secures Your Front Door? By Sanso Uka Your front door is the… Read more: Best Smart Doorbell 2026
 - How Smart Home Automation
 How Smart Home Automation Works in 2026: A Complete Guide How Smart Home Automation Works in 2026: A Complete… Read more: How Smart Home Automation