Automated Home Theater Systems: Complete Setup Guide (2026)
Building automated home theater systems transforms movie watching from a process involving multiple remotes, manual adjustments, and technical frustration into a seamless, cinema-quality experience triggered by a single voice command or button press. I remember the first time I walked into a friend’s fully automated theater room—he simply said “movie time” and watched as the lights dimmed perfectly, blackout shades descended, the projector powered on, the receiver switched to the correct input, and the Blu-ray player started playing trailers. That moment of technological elegance convinced me to build my own system.
The reality of creating such systems is more accessible than most people assume. You don’t need a dedicated theater room or five-figure budgets to achieve meaningful automation. Modern smart home technology enables impressive automation even in living rooms with standard TVs, soundbars, and streaming devices.
In this comprehensive guide, I’ll walk you through everything needed to create automated home theater systems at various budget levels and complexity tiers. We’ll cover essential components, automation platforms that tie everything together, step-by-step setup processes, advanced features that elevate the experience, common mistakes that waste money, and realistic budgets for different scenarios. By the end, you’ll understand exactly how to build a theater automation system tailored to your space, preferences, and budget.

Understanding Home Theater Automation Components
Automated home theater systems consist of interconnected components that respond to centralized control commands rather than individual manual operation. Understanding each component’s role helps you design systems that actually enhance your viewing experience rather than adding complexity.
Display devices—whether TVs, projectors, or both—form the visual foundation. Modern smart TVs include built-in automation capabilities through CEC (Consumer Electronics Control) that allows single-remote control of connected devices. Projectors require additional automation for features like motorized screens, blackout shades, and masking systems that adjust aspect ratios automatically. The display choice significantly impacts automation complexity and possibilities.
Audio systems range from simple soundbars to elaborate multi-channel receivers with separate amplifiers and ceiling speakers. Soundbars offer plug-and-play automation through HDMI-CEC or optical connections. Full receivers provide superior sound quality but require more sophisticated control integration. The audio component you choose determines whether automation means “turn on soundbar with TV” or “configure 7.2.4 Dolby Atmos processing, adjust room correction, and set volume presets based on content type.”
Source devices include streaming boxes (Apple TV, Nvidia Shield, Roku), game consoles, Blu-ray players, and media servers. Each adds automation considerations—some integrate better with smart home platforms than others. Apple TV works seamlessly in HomeKit environments, Shield excels with Google Home, and many devices support generic protocols like HDMI-CEC that provide basic automation regardless of ecosystem.
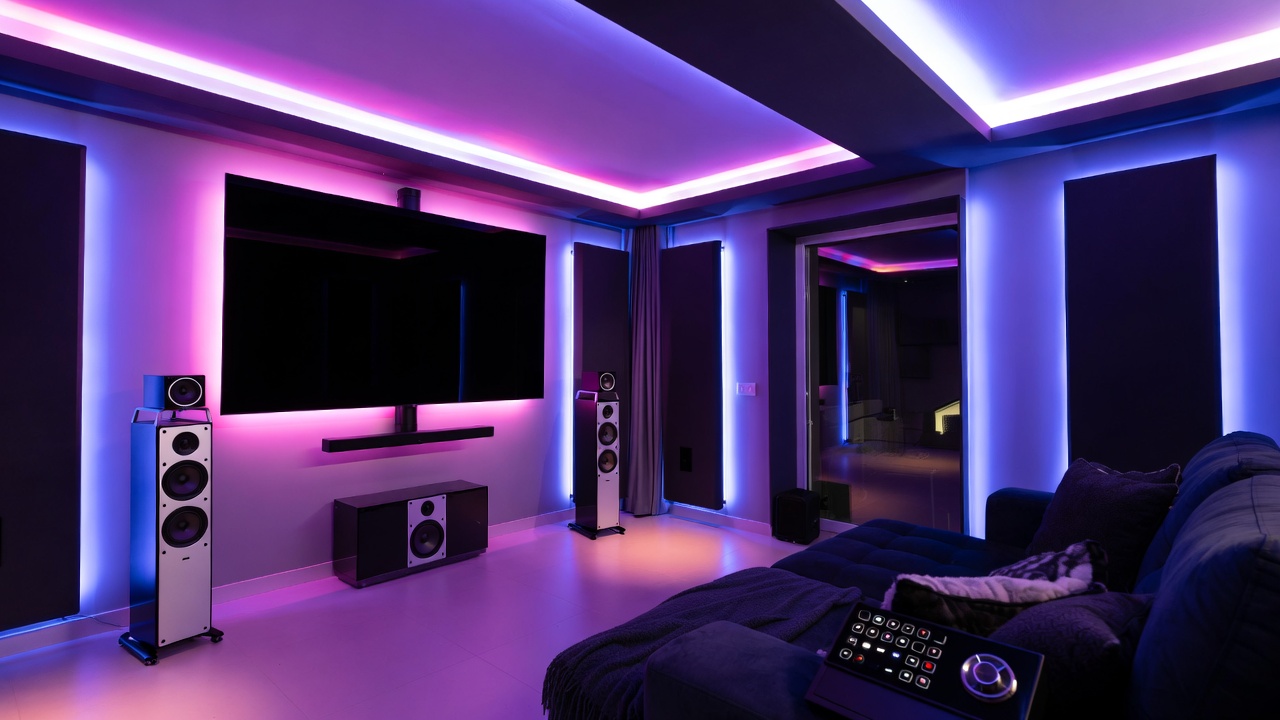
Environmental controls encompass lighting, motorized shades or curtains, and climate adjustments. Smart lights that dim automatically when movies start, blackout shades that descend for daytime viewing, and thermostats that maintain comfortable temperatures during extended viewing sessions all contribute to the immersive experience. These environmental elements often make the biggest subjective difference in how “automated” the theater feels. Understanding how these components integrate with broader home automation strategies helps create cohesive systems.
Automation Platforms: Choosing Your Control Foundation
The automation platform you choose determines how components communicate, what advanced features you can implement, and how easily you can expand or modify the system over time. Different platforms suit different needs and technical comfort levels.
Home Assistant represents the most powerful and flexible platform for automated home theater systems, running on dedicated hardware like Raspberry Pi or mini PCs. This open-source platform integrates thousands of devices and services, enabling complex automations that commercial platforms can’t match. You can create scenes that adjust 20+ parameters simultaneously, build conditional logic that adapts based on time of day or content type, and integrate virtually any smart device regardless of manufacturer.
The trade-off is complexity—Home Assistant requires technical comfort with YAML configuration files, networking concepts, and troubleshooting. I spent approximately 20 hours learning Home Assistant basics before achieving reliable theater automation, though subsequent improvements took minutes rather than hours. This platform suits enthusiasts willing to invest learning time for maximum capabilities and complete control.
Apple HomeKit provides elegant simplicity for Apple ecosystem users, controlling compatible devices through iPhone, iPad, or HomePod. Theater automation in HomeKit means creating scenes like “Movie Night” that trigger multiple devices with a single Siri command or automation. The limitations become apparent quickly—fewer compatible devices, simpler automation logic, and minimal customization compared to Home Assistant.
However, for users with HomeKit-compatible equipment who prioritize ease-of-use over advanced features, the platform works beautifully. Setup takes minutes rather than hours, and the automation reliability is excellent. I’ve helped several family members create HomeKit theater scenes, and all successfully implemented them without technical assistance after initial setup.
Samsung SmartThings offers middle-ground versatility with broader device compatibility than HomeKit and easier setup than Home Assistant. The platform supports custom automation routines with decent conditional logic, integrates with major smart home brands, and provides both app-based and voice control through Alexa or Google Assistant. SmartThings works well for users wanting more capability than HomeKit offers without diving into Home Assistant’s technical complexity.
Amazon Alexa and Google Home represent the most accessible automation platforms, leveraging voice control and simple routines to coordinate theater components. These platforms excel at basic automation—”Alexa, movie time” can dim lights, turn on TV and soundbar, and start streaming apps. Advanced features like conditional logic, complex sequences, or integration with non-mainstream devices become difficult or impossible. Understanding how these platforms relate to voice assistant ecosystems helps inform your choice.

Essential Automation Scenarios for Home Theaters
Understanding which automation scenarios provide genuine value helps you prioritize features during system design and avoid over-engineering solutions that add complexity without meaningful benefits.
The “movie start” automation represents the foundational scenario that most automated home theater systems implement first. This single trigger activates multiple components in sequence: lights dim to 20-30% for safe movement, then fade to 5% once everyone is seated. Motorized shades close if it’s daytime. The TV or projector powers on, the receiver switches to the correct input and loads the appropriate audio profile, and the streaming device or Blu-ray player becomes active. Room temperature adjusts if needed for extended viewing comfort.
Creating reliable movie start sequences requires careful timing. Components need 2-5 seconds between power-on and input switching to initialize properly. Lights should dim before the display turns on to prevent eye strain from sudden brightness changes in dark rooms. I learned this through frustrating trial and error—my initial automation turned everything on simultaneously, causing receivers to miss input commands and projectors to display “no signal” messages because source devices hadn’t finished booting.
Content-specific automation scenarios take theater systems to the next level by adjusting settings based on what you’re watching. Sports viewing might maintain 40% lighting for conversation and snacking, use stereo audio mode for clearer commentary, and display content in vivid picture modes that emphasize color and motion. Movie watching triggers the full cinema experience with minimal lighting, surround sound, and film-accurate picture calibration. Gaming scenarios might enable game mode for reduced input lag, increase lighting slightly for controller visibility, and configure audio for directional advantage.
Pause/resume automations improve the viewing experience during breaks. When you pause content, lights gradually rise to 50-60% for bathroom breaks or refills without blinding transitions. Resume playback, and lights automatically dim back to viewing levels. This seems trivial until you’ve fumbled with light switches mid-movie dozens of times—the automation eliminates that friction completely.
End-of-content automation handles the shutdown sequence intelligently. Rather than manually turning off multiple components, a single “I’m done” command or automatic detection of playback ending triggers coordinated shutdown: pause the content, raise lights to 80% over 10 seconds to prevent sudden brightness shock, turn off display and audio components after a brief delay, return shades to open position if desired, and restore room temperature to normal settings. The gradual transitions and proper sequencing make the experience feel professional rather than jarring.
Budget-Conscious Automation: $500-1,500 Systems
You don’t need thousands of dollars to create meaningful automated home theater systems. Strategic component selection and realistic feature prioritization enable impressive automation on modest budgets.
Start with a smart TV that includes CEC functionality—most TVs from the past 5 years qualify. This costs nothing additional since you need a TV regardless, but it enables basic automation where the TV controls connected soundbars and streaming devices. Add a quality soundbar with HDMI-ARC/eARC connection ($200-400) and a streaming device like Roku, Fire TV, or Chromecast ($30-50). These three components work together through CEC without requiring separate automation hubs.
Add smart lighting using affordable smart bulbs ($10-15 each) in existing fixtures. Four bulbs covering main seating areas cost $40-60 and provide the lighting automation that makes the biggest subjective impact. Choose bulbs compatible with your preferred ecosystem—Wyze, Sengled, or LIFX for budget-conscious buyers, or Philips Hue for premium quality with better automation capabilities.
Select a basic automation platform—Alexa or Google Home work well for budget builds. An Echo Dot ($30-50) or Google Nest Mini ($30-50) provides voice control for the entire system. Create simple routines: “Movie time” turns on TV and soundbar via CEC, dims lights to 20%, and starts your streaming service. “Pause” raises lights to 50%. “I’m done” turns everything off and returns lights to 80%.
The total investment for this basic automated system runs approximately $300-600 beyond the TV you’d buy anyway. It won’t match dedicated theater room sophistication, but it delivers 80% of the convenience and automation benefit for 10-15% of the cost. I built a system similar to this for my parents, and they use the voice commands multiple times daily—the automation genuinely improved their viewing experience despite the modest investment. Those exploring budget-friendly approaches should consider how these automation principles apply to other tech gadget investments as well.

Mid-Range Automation: $2,000-5,000 Systems
Mid-range budgets enable more sophisticated automated home theater systems with enhanced audio quality, environmental control, and automation capabilities that approach dedicated theater room experiences.
Upgrade audio to a proper AV receiver ($400-700) paired with a 5.1 or 5.1.2 speaker configuration ($600-1,200 for decent quality). This introduces real surround sound that transforms the viewing experience, but also adds automation complexity. Modern receivers from Denon, Yamaha, and Marantz support network control, enabling automation platforms to switch inputs, adjust volume, and change audio processing modes programmatically.
The display can upgrade to a short-throw or ultra-short-throw projector ($1,000-2,500) with a motorized screen ($300-600). Projectors deliver true cinema-scale images, and motorized screens enable the “theater emerging from living room” transformation that never stops feeling impressive. Automation triggers screen descent and projector power-on simultaneously, creating seamless transitions from casual living space to dedicated viewing environment.
Motorized blackout shades ($150-300 per window for quality options) solve daytime viewing challenges that plague projector setups. Smart shades descend automatically when movie scenes start during daylight hours, block light completely, then rise when content ends. This automation addresses the single biggest projector limitation—poor daytime performance without proper light control.
Enhanced lighting control through LED strip lighting ($30-80 for quality options) behind the TV or along the ceiling adds bias lighting that reduces eye strain and creates ambiance without distracting brightness. Smart switches ($40-60 each) replace traditional switches for permanent overhead lighting control rather than relying on smart bulbs. The switches integrate better with automation platforms and don’t lose functionality when someone accidentally flips a switch.
Upgrade to SmartThings ($89 for the hub) or invest time learning Home Assistant (free software, $35-100 for Raspberry Pi hardware) to gain automation capabilities beyond basic Alexa routines. These platforms enable content-specific scenes, conditional automations based on time of day, and integration with a broader range of smart devices. The additional capability justifies the modest cost and learning investment.
This mid-range approach delivers professional-quality results with total automation investment around $3,000-5,000 including the display and audio upgrades. The experience gap between this and $20,000+ custom installations is smaller than the price difference suggests—you’re getting 90% of the experience for 15-25% of the cost by making strategic component choices and handling installation yourself.
Advanced Features for Ultimate Automation
Once basic automation works reliably, several advanced features elevate automated home theater systems from convenient to exceptional, creating experiences that rival or exceed commercial cinema.
Acoustic treatments integrated with motorized panels or curtains transform rooms acoustically for optimal sound. Motorized fabric panels descend during movie playback to cover reflective surfaces, reducing echo and improving dialogue clarity. Automated bass traps extend from wall corners for enhanced low-frequency control during action movies, then retract for music listening where different acoustic properties are preferred. These systems seem extravagant but make measurable differences in audio quality.
Dynamic lighting that responds to on-screen content creates immersive effects. Philips Hue Sync, LIFX Beam, or Govee Immersion systems analyze the colors on screen and reflect them onto walls behind your display in real-time. During sunset scenes, warm orange glows behind the TV. Action sequences flash blues and reds. The effect sounds gimmicky but genuinely enhances immersion for certain content types—my Star Wars viewings feel noticeably more engaging with synchronized lighting.
Presence detection through motion sensors, door contacts, or phone-based occupancy sensing enables truly automatic transitions. The system detects when you enter the theater room in the evening, infers movie-watching intent, and begins the startup sequence proactively. When everyone leaves, it automatically shuts down after a configurable delay. This eliminates even the voice command or button press—the theater simply responds to your presence.
Masking systems for projector setups automatically adjust the visible screen area to match content aspect ratios. Watching 2.35:1 ultra-widescreen movies? The motorized masking panels move inward to hide black bars and maintain a perfect rectangular viewing area. Switching to 16:9 TV shows? The masks retract to reveal the full screen. Professional theaters use this technique, and automated implementations work surprisingly well for home installations.
Integration with media servers like Plex or Emby enables content-aware automation. The system detects what you’re watching and applies appropriate settings automatically. Starting a Marvel movie triggers Dolby Atmos processing, dims lights to 5%, and loads the “action movie” audio preset. Playing a documentary maintains 20% lighting, uses stereo audio for clear narration, and enables subtitles automatically. Content metadata drives intelligent automation without manual scene selection. Understanding how these advanced capabilities relate to emerging machine learning applications shows where home theater automation is heading.
Common Mistakes That Undermine Automation
Building automated home theater systems involves numerous technical decisions and implementation details. Common mistakes waste money, create frustration, or prevent automation from working reliably.
The biggest error is over-automating before establishing reliable basic functionality. Enthusiasts often attempt complex content-aware automation, dynamic lighting, and advanced environmental control before confirming their TV, receiver, and lights respond consistently to simple commands. Build and perfect basic “movie start” and “movie end” automations first. Only after those work flawlessly for weeks should you add complexity.
Another frequent mistake involves ignoring network infrastructure requirements. Automation platforms, streaming devices, smart lights, and networked receivers all demand reliable Wi-Fi or Ethernet connectivity. Attempting automation on marginal network coverage guarantees intermittent failures and frustration. Invest in robust networking—quality mesh Wi-Fi systems or Ethernet runs to key components—before expecting reliable automation. I’ve troubleshot countless “automation problems” that were actually network connectivity issues in disguise.
Mixing incompatible ecosystems creates unnecessary complexity and limitations. Choosing Philips Hue lights, a Yamaha receiver, Apple TV, and Alexa voice control might seem like selecting best-in-class components, but the integration challenges multiply with each ecosystem added. Stay within 1-2 compatible ecosystems when possible, accepting minor compromises on individual components for dramatically simpler integration.
Neglecting proper HDMI cable quality and management causes mysterious automation failures. A $5 HDMI cable might display pictures fine manually but fail to reliably transmit CEC commands or ARC audio. Automation exposes these marginal connections that work intermittently. Invest in certified Premium High Speed HDMI cables ($10-20 each) for all connections involved in automation sequences. The modest cost prevents hours of troubleshooting ghost problems.
Setting unrealistic automation timing creates sequences that fail unpredictably. Components need initialization time after power-on before accepting input commands. Projectors require 10-15 seconds to warm up before displaying content. Receivers need 3-5 seconds before processing input switches. Build appropriate delays into automation sequences—2-3 second delays between each command generally ensures reliability. Faster isn’t better if it means commands fail 20% of the time.
Finally, many builders neglect user interfaces beyond voice control. Voice commands work well initially but become annoying for routine use—you won’t want to shout commands during quiet moments or when others are sleeping. Provide physical automation triggers through smart buttons, wall switches, or universal remotes. The Logitech Harmony series, while discontinued for new development, remains excellent for physical control of automated systems. Physical backup controls prevent automation from feeling mandatory rather than convenient.
Step-by-Step: Building Your First Automated Theater
Creating automated home theater systems becomes manageable when approached systematically rather than attempting everything simultaneously. This step-by-step process builds complexity gradually while maintaining working systems throughout.
Week 1: Install and configure basic components without automation. Set up your TV, soundbar or receiver, streaming devices, and verify everything works with traditional remotes. This establishes the baseline functionality that automation will enhance. Test all inputs, adjust picture settings, configure audio to your preferences, and ensure you understand how components interact manually.
Week 2: Add smart lighting and create your first manual scenes. Install smart bulbs or switches, configure them in their native apps, and manually create “Movie” and “Normal” lighting scenes with appropriate brightness levels. Test the scenes repeatedly until the lighting behavior feels right. Don’t automate yet—just establish the desired lighting states.
Week 3: Select and set up your automation platform. Install Home Assistant, configure SmartThings, or set up HomeKit/Alexa/Google Home depending on your chosen ecosystem. Connect your smart lights to the platform and verify you can control them from the automation interface. This week focuses solely on getting the platform working with one component type.
Week 4: Create your first simple automation: lights respond to time of day. When the sun sets, lights automatically brighten to comfortable levels. This tests automation fundamentals without involving complex A/V components. Refine timing, transitions, and behavior until this simple automation works perfectly for a full week without intervention.
Week 5: Add TV and soundbar control to your automation platform. Configure network control if available, or set up IR blasters, CEC triggers, or smart plugs as appropriate for your components. Create a manual scene that turns everything on and sets correct inputs. Test extensively—this week is about reliable control, not automation.
Week 6: Create your first complete “Movie Start” automation that combines lighting and A/V control. Trigger it manually initially—use a button, voice command, or automation platform interface. Document every failure and refine timing, sequencing, and commands until the automation succeeds 95%+ of the time over a full week.
Week 7+: Add complexity incrementally. Introduce motorized shades, create content-specific scenes, implement pause/resume lighting changes, or add presence detection. Each new feature gets one week of testing and refinement before adding the next. This disciplined approach prevents the overwhelming complexity that causes many automation projects to fail.
This methodical process transforms automated home theater systems from intimidating projects into manageable weekly increments. The key is maintaining working functionality at every step rather than dismantling everything for a “big bang” automation implementation that might fail. Those interested in systematic approaches to technology projects can find similar methodologies helpful when exploring essential software implementations.
Making Your Decision: Is Automation Worth It?
After examining the components, platforms, costs, and implementation approaches for automated home theater systems, you can make informed decisions about whether automation makes sense for your situation and which level of investment is appropriate.
Automation clearly adds value if you watch content regularly (4+ times weekly), have multiple people in the household with different technical comfort levels, want to impress guests with seamless technology, or simply enjoy optimizing and refining systems. The convenience compounds with usage—daily viewers get more value than occasional weekend movie watchers.
Start with basic automation using existing devices plus minimal additional investment ($200-400 for smart lights and a voice assistant) if you’re uncertain about commitment. This level provides genuine convenience improvements and helps you determine whether more sophisticated automation justifies additional spending. Many people discover that basic automation satisfies their needs completely, saving thousands compared to jumping immediately to advanced implementations.
Invest in mid-range automation ($2,000-5,000 total system) if you’re committed to home theater as a primary entertainment source, willing to learn automation platforms, and plan to stay in your current space for 3+ years to justify the investment. This level delivers professional-quality experiences that exceed most people’s expectations while remaining financially accessible to middle-class budgets.
Consider advanced automation only if you’re genuinely enthusiastic about home theater technology, enjoy the implementation process itself, have dedicated space for a theater room, and accept that you’re optimizing beyond the point of diminishing returns. High-end automation becomes a hobby rather than purely practical investment—and that’s perfectly valid if it brings you joy.
The honest assessment: basic automation makes financial sense for most regular content viewers, mid-range automation delivers exceptional value for dedicated enthusiasts, and advanced automation serves a small niche who view the journey as important as the destination. Choose the level that matches both your budget and your genuine interest in the technology itself rather than chasing theoretical perfection.
Conclusion
Automated home theater systems have evolved from exclusive luxury installations to accessible conveniences that genuinely improve daily entertainment experiences. The technology works reliably, costs less than most people assume, and provides value through convenience, entertainment quality, and the simple pleasure of well-executed automation.
The fundamental principle behind successful automation is starting simple and building complexity gradually. A basic system with smart lighting and voice control delivers immediate value for minimal investment. Mid-range implementations with quality audio, environmental control, and sophisticated automation platforms create experiences rivaling commercial theaters. Advanced systems with content-aware automation, dynamic lighting, and presence detection push boundaries but serve narrow audiences.
Key success factors include choosing compatible components within 1-2 ecosystems, investing in robust network infrastructure, building reliable basic automation before adding complexity, and maintaining realistic expectations about what automation achieves. Technology can’t fix poor component selection or bad room design, but it can transform good components and spaces into exceptional experiences.
My recommendation for most readers: start with $300-500 in smart lighting and voice control added to your existing theater setup. Use this for 2-3 months to understand how automation affects your viewing habits. If you love it and want more, expand to mid-range automation with better audio and environmental control. If basic automation satisfies your needs, you’ve created meaningful value for minimal investment and avoided overspending on unused capabilities. The perfect automated home theater matches your actual usage patterns rather than theoretical possibilities—build for how you actually watch content, not how you imagine you might.
🛒 Recommended Products for Automated Home Theater Systems
Based on the automated home theater systems discussed in this article, we’ve curated a selection of top-rated products that deliver exceptional performance and value. These recommendations are carefully chosen to help you implement the solutions that best fit your needs and budget.


- Best Cheap Smartwatch Under $50
 Best Cheap Smartwatch Under $50: 5 Reliable Picks for 2026 By Sanso Uka If you’re hunting for… Read more: Best Cheap Smartwatch Under $50
 - Best Dash Cams of 2026
 Best Dash Cams of 2026: Top Picks for Every Driver and Budget By Wanderson Nogueira Martins Choosing… Read more: Best Dash Cams of 2026
 - How to Transfer Data to New Phone
 How to Transfer Data to a New Phone: A Step-by-Step Guide for 2026 By Sanso Uka Upgrading… Read more: How to Transfer Data to New Phone
 - Senior-Friendly Smartphones 2026
 Senior-Friendly Smartphones 2026: Best Overall Picks for Every Budget By Sanso Uka Senior-friendly smartphones in 2026 have… Read more: Senior-Friendly Smartphones 2026
 - Best Mechanical Keyboards in 2026
 Best Mechanical Keyboards in 2026 Best Mechanical Keyboards in 2026: Top Picks for Every Budget and Use… Read more: Best Mechanical Keyboards in 2026
 - Best Monitor for Home Office 2026
 Best Monitor for Home Office 2026: Expert Picks & Buying Guide By Sanso Uka Your monitor is… Read more: Best Monitor for Home Office 2026
 - How to Extend Smartphone Battery Life
 How to Extend Smartphone Battery Life: 12 Practical Tips That Actually Work By Sanso Uka You unplugged… Read more: How to Extend Smartphone Battery Life
 - Best E-Readers in 2026
 Best E-Readers in 2026: Which One Is Actually Worth Buying? Best E-Readers in 2026: Which One Is… Read more: Best E-Readers in 2026
 - Refurbished vs New Laptop
 Refurbished vs New Laptop: Which Should You Buy in 2026? By Sanso Uka When you’re in the… Read more: Refurbished vs New Laptop
 - Best Gaming Headsets Under $100
 Best Gaming Headsets Under $100 in 2026: Top Picks for Every Platform By Sanso Uka Finding the… Read more: Best Gaming Headsets Under $100
 - How Long Do Laptops Last
 How Long Do Laptops Really Last? A Practical Guide to Lifespan By Sanso Uka If you are… Read more: How Long Do Laptops Last
 - Best Portable Charger 2026
 Best Portable Charger in 2026: Top Power Banks for Every Budget and Use Case By Wanderson Nogueira… Read more: Best Portable Charger 2026